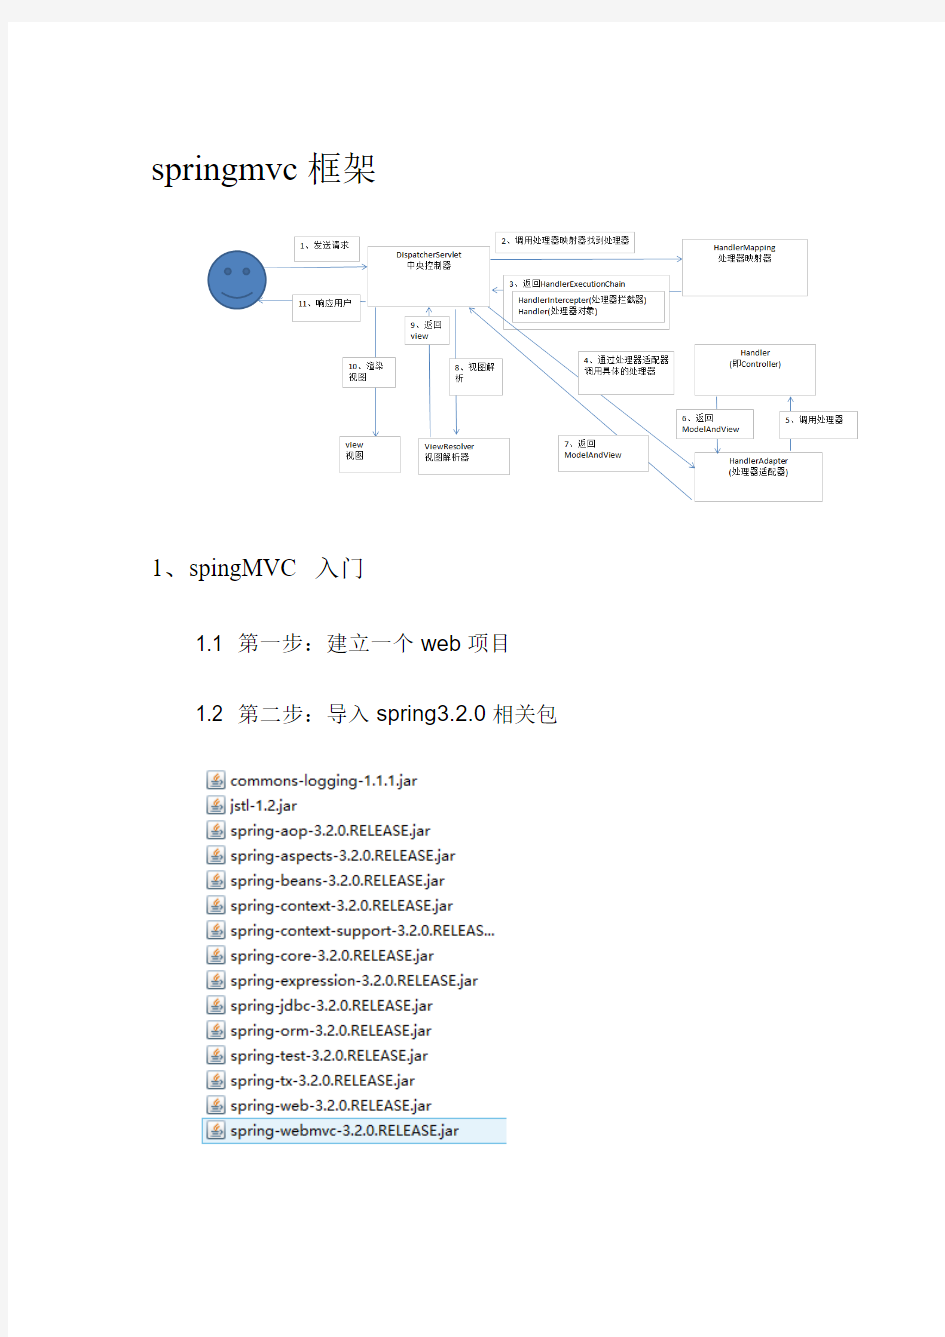
springmvc框架
1、spingMVC 入门
1.1 第一步:建立一个web项目
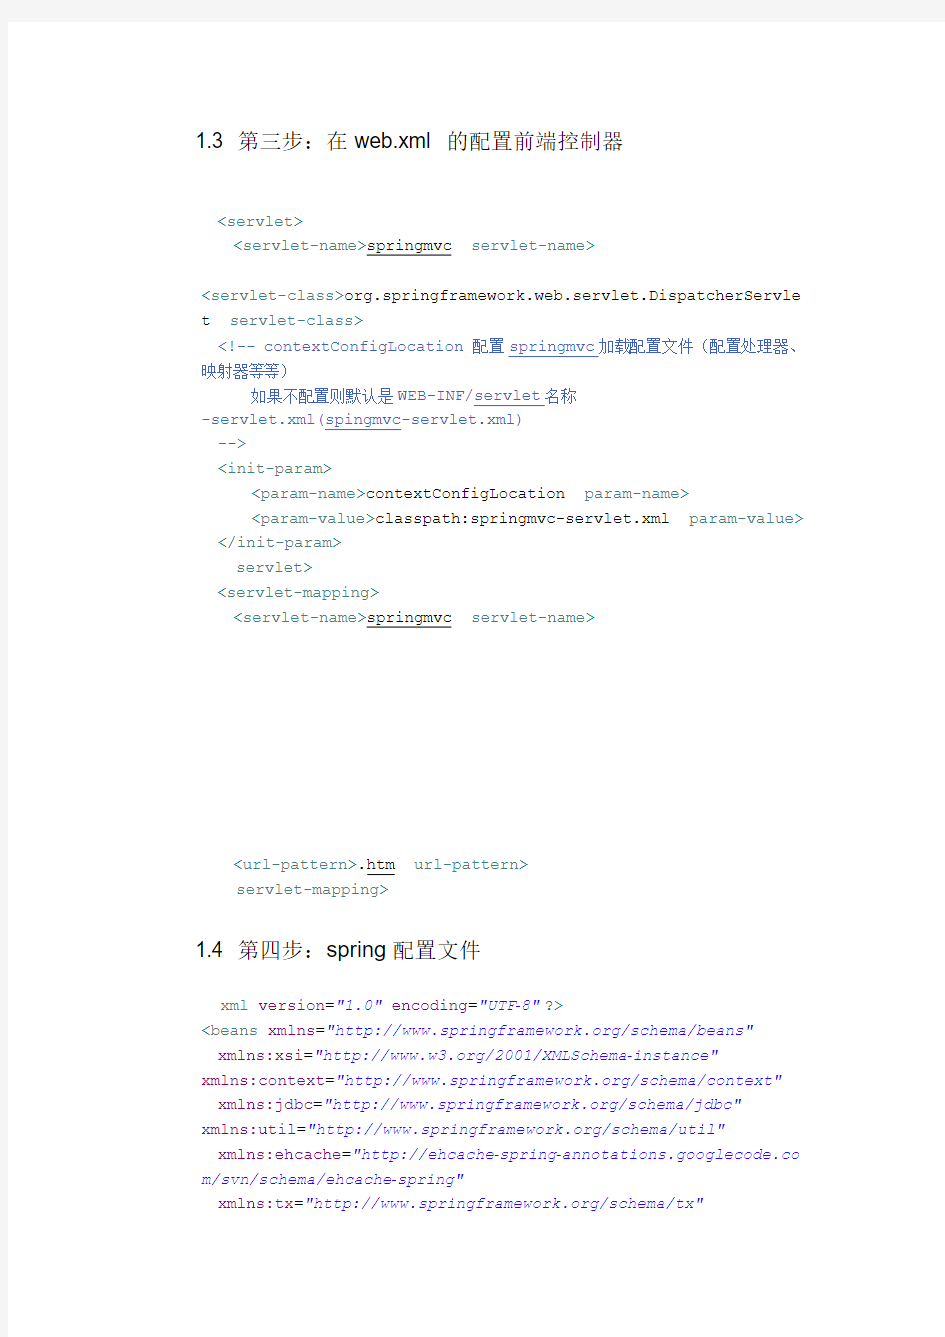
1.2 第二步:导入spring3.
2.0相关包
1.3 第三步:在web.xml 的配置前端控制器
1.4 第四步:spring配置文件
xmlns:xsi="https://www.doczj.com/doc/d59743770.html,/2001/XMLSchema-instance" xmlns:context="https://www.doczj.com/doc/d59743770.html,/schema/context" xmlns:jdbc="https://www.doczj.com/doc/d59743770.html,/schema/jdbc" xmlns:util="https://www.doczj.com/doc/d59743770.html,/schema/util" xmlns:ehcache="http://ehcache-spring-annotations.googlecode.co m/svn/schema/ehcache-spring" xmlns:tx="https://www.doczj.com/doc/d59743770.html,/schema/tx" xsi:schemaLocation="https://www.doczj.com/doc/d59743770.html,/schema/bean s https://www.doczj.com/doc/d59743770.html,/schema/beans/spring-beans-3.0.x sd https://www.doczj.com/doc/d59743770.html,/schema/context https://www.doczj.com/doc/d59743770.html,/schema/context/spring-context-3 .0.xsd https://www.doczj.com/doc/d59743770.html,/schema/tx https://www.doczj.com/doc/d59743770.html,/schema/tx/spring-tx-3.0.xsd https://www.doczj.com/doc/d59743770.html,/schema/util https://www.doczj.com/doc/d59743770.html,/schema/util/spring-util-3.0.xsd https://www.doczj.com/doc/d59743770.html,/svn/schema/eh cache-spring https://www.doczj.com/doc/d59743770.html,/svn/schema/eh cache-spring/ehcache-spring-1.0.xsd"> 1.5 第五步:配置处理器适配器 在springmvc配置文件中配置 class="org.springframework.web.servlet.mvc.SimpleControllerHand lerAdapter" /> 通过查看源码: 此适配器执行实现Controller 接口的Handler 1.6 第六步:编写Handler 1.7 第七步:编写jsp页面 1.8第八步:配置handler 将handler在spring中加载 class="https://www.doczj.com/doc/d59743770.html,.sgg.controller.ItemsController"/> 1.9第九步:配置处理器映射器 在springmvc配置文件中配置 指定beanname(就是url)--> class="org.springframework.web.servlet.handler.BeanNameUrlHandl erMapping"> 1.10第十步:配置视图解析器 在springmvc配置文件中配置 class="org.springframework.web.servlet.view.InternalResourceViewResol ver"> 1.11第十一步:部署调试 Url:http://localhost:8080/queryItems.action 2、非注解的处理器映射器和适配器 2.1非注解处理器映射器 org.springframework.web.servlet.handler.BeanNameUrlHandlerMapping org.springframework.web.servlet.handler.SimpleUrlHandlerMapping class="org.springframework.web.servlet.handler.SimpleUrlHandler Mapping"> 总结:多个映射器可以并处,多个url可以对应同一个Controller。前端控制器判断url。 2.2非注解处理器适配器 org.springframework.web.servlet.mvc.SimpleControllerHandlerAdapter 要求handler 实现controller接口 org.springframework.web.servlet.mvc.HttpRequestHandlerAdapter 要求handler 实现HttpRequestHandler接口 //使用此方法可以通过Response 修改相应内容,比如返回json数据 response.setContentType("appliaction/json;charset=utf-8"); response.setCharacterEncoding("utf-8"); response.getWriter().write("json字符串"); 总结:可以配置多个适配器 3、DispatcherServlet.properties /org/springframework/web/servlet/DispatcherServlet.properties 前端控制器从上面文件中加载处理映射器、适配器、视图解析器等组件,如果不在srpingmvc.xml中配置,则使用默认加载。 4、注解的处理器映射器和适配器 4.1注解映射器 在Spring 3.1之前使用 org.springframework.web.servlet.mvc.annotation.DefaultAnnotatio nHandlerMapping 在Spring 3.1之后使用 org.springframework.web.servlet.mvc.method.annotation.RequestMa ppingHandlerMapping 在Spring 3.1之前使用 org.springframework.web.servlet.mvc.annotation.AnnotationMethod HandlerAdapter 在Spring 3.1之后使用 org.springframework.web.servlet.mvc.method.annotation.RequestMa ppingHandlerAdapter 4.2配置注解映射器和适配器 class="org.springframework.web.servlet.mvc.method.annotation.Re questMappingHandlerMapping"/> class="org.springframework.web.servlet.mvc.method.annotation.Re questMappingHandlerAdapter"/> 4.3配置组件扫描
相关主题
文本预览